
EVERYTHING TUBELESS - a bike maintenance course
Clean your chain, lube your chain, check your brake pads, add air to your tires and suspension, check your cables, top up your sealant.
These just are a few of the things every rider should be on top of weekly, if not every ride. we know it’s not realistic to expect everyone to have time to learn how to do these jobs, let alone execute said MAINTENANCE regularly — but one thing you can do for your bike in two minutes or less is add sealant to your tires. why should you do this?
it’s really easy to do
sealant dries up over time. tubeless sytems require wet sealant to stay inflated
prevents trailside flats
despite the ease with which this task is performed, you will impresses everyone, and i mean everyone
if the idea of tubeless tires invokes deep anxiety and self-doubt, you are not alone — just watch these professional mechanics fumble through the process on Desafio Mechanico — a brazilian bike mechanic competition, and something i am dying to see come to canada.
jump to about eight-and-a-half minutes through the video to get a sense of just how mystifying tubeless sytems are, even to some working mechanics. trust us, it’s 100x easier than some of these pros make it look.
keep reading for a few quick tips - or consider signing up for our everything tubeless MAINTENANCE course on november 30 to spend time with expert instructors.
here on the coast, we RECOMMEND “topping-up” your sealant every three months or so. you want to do this *before the sealant dries out, and you want to be sure to use the same sealant that’s already in your tire.
we use stan’s sealant for a number of reasons: the price, reliability and because it’s what most people use. this allows us to add stan’s to most of our customers’ setups without stressing that we’ve created giant sealant booger monsters. Booger monsters make a lot of noise, and when sealnt clumps up, it’s not doing it’s job filling in microscopic holes and actually sealing your tire.
you can do hard things, but this is too easy to be considered one of them
here’s the big reveal - you don’t need any super special fancy tools to manage your sealant. what you will need is a valve core remover, a stan’s squeeze bottle and pump or compressor.
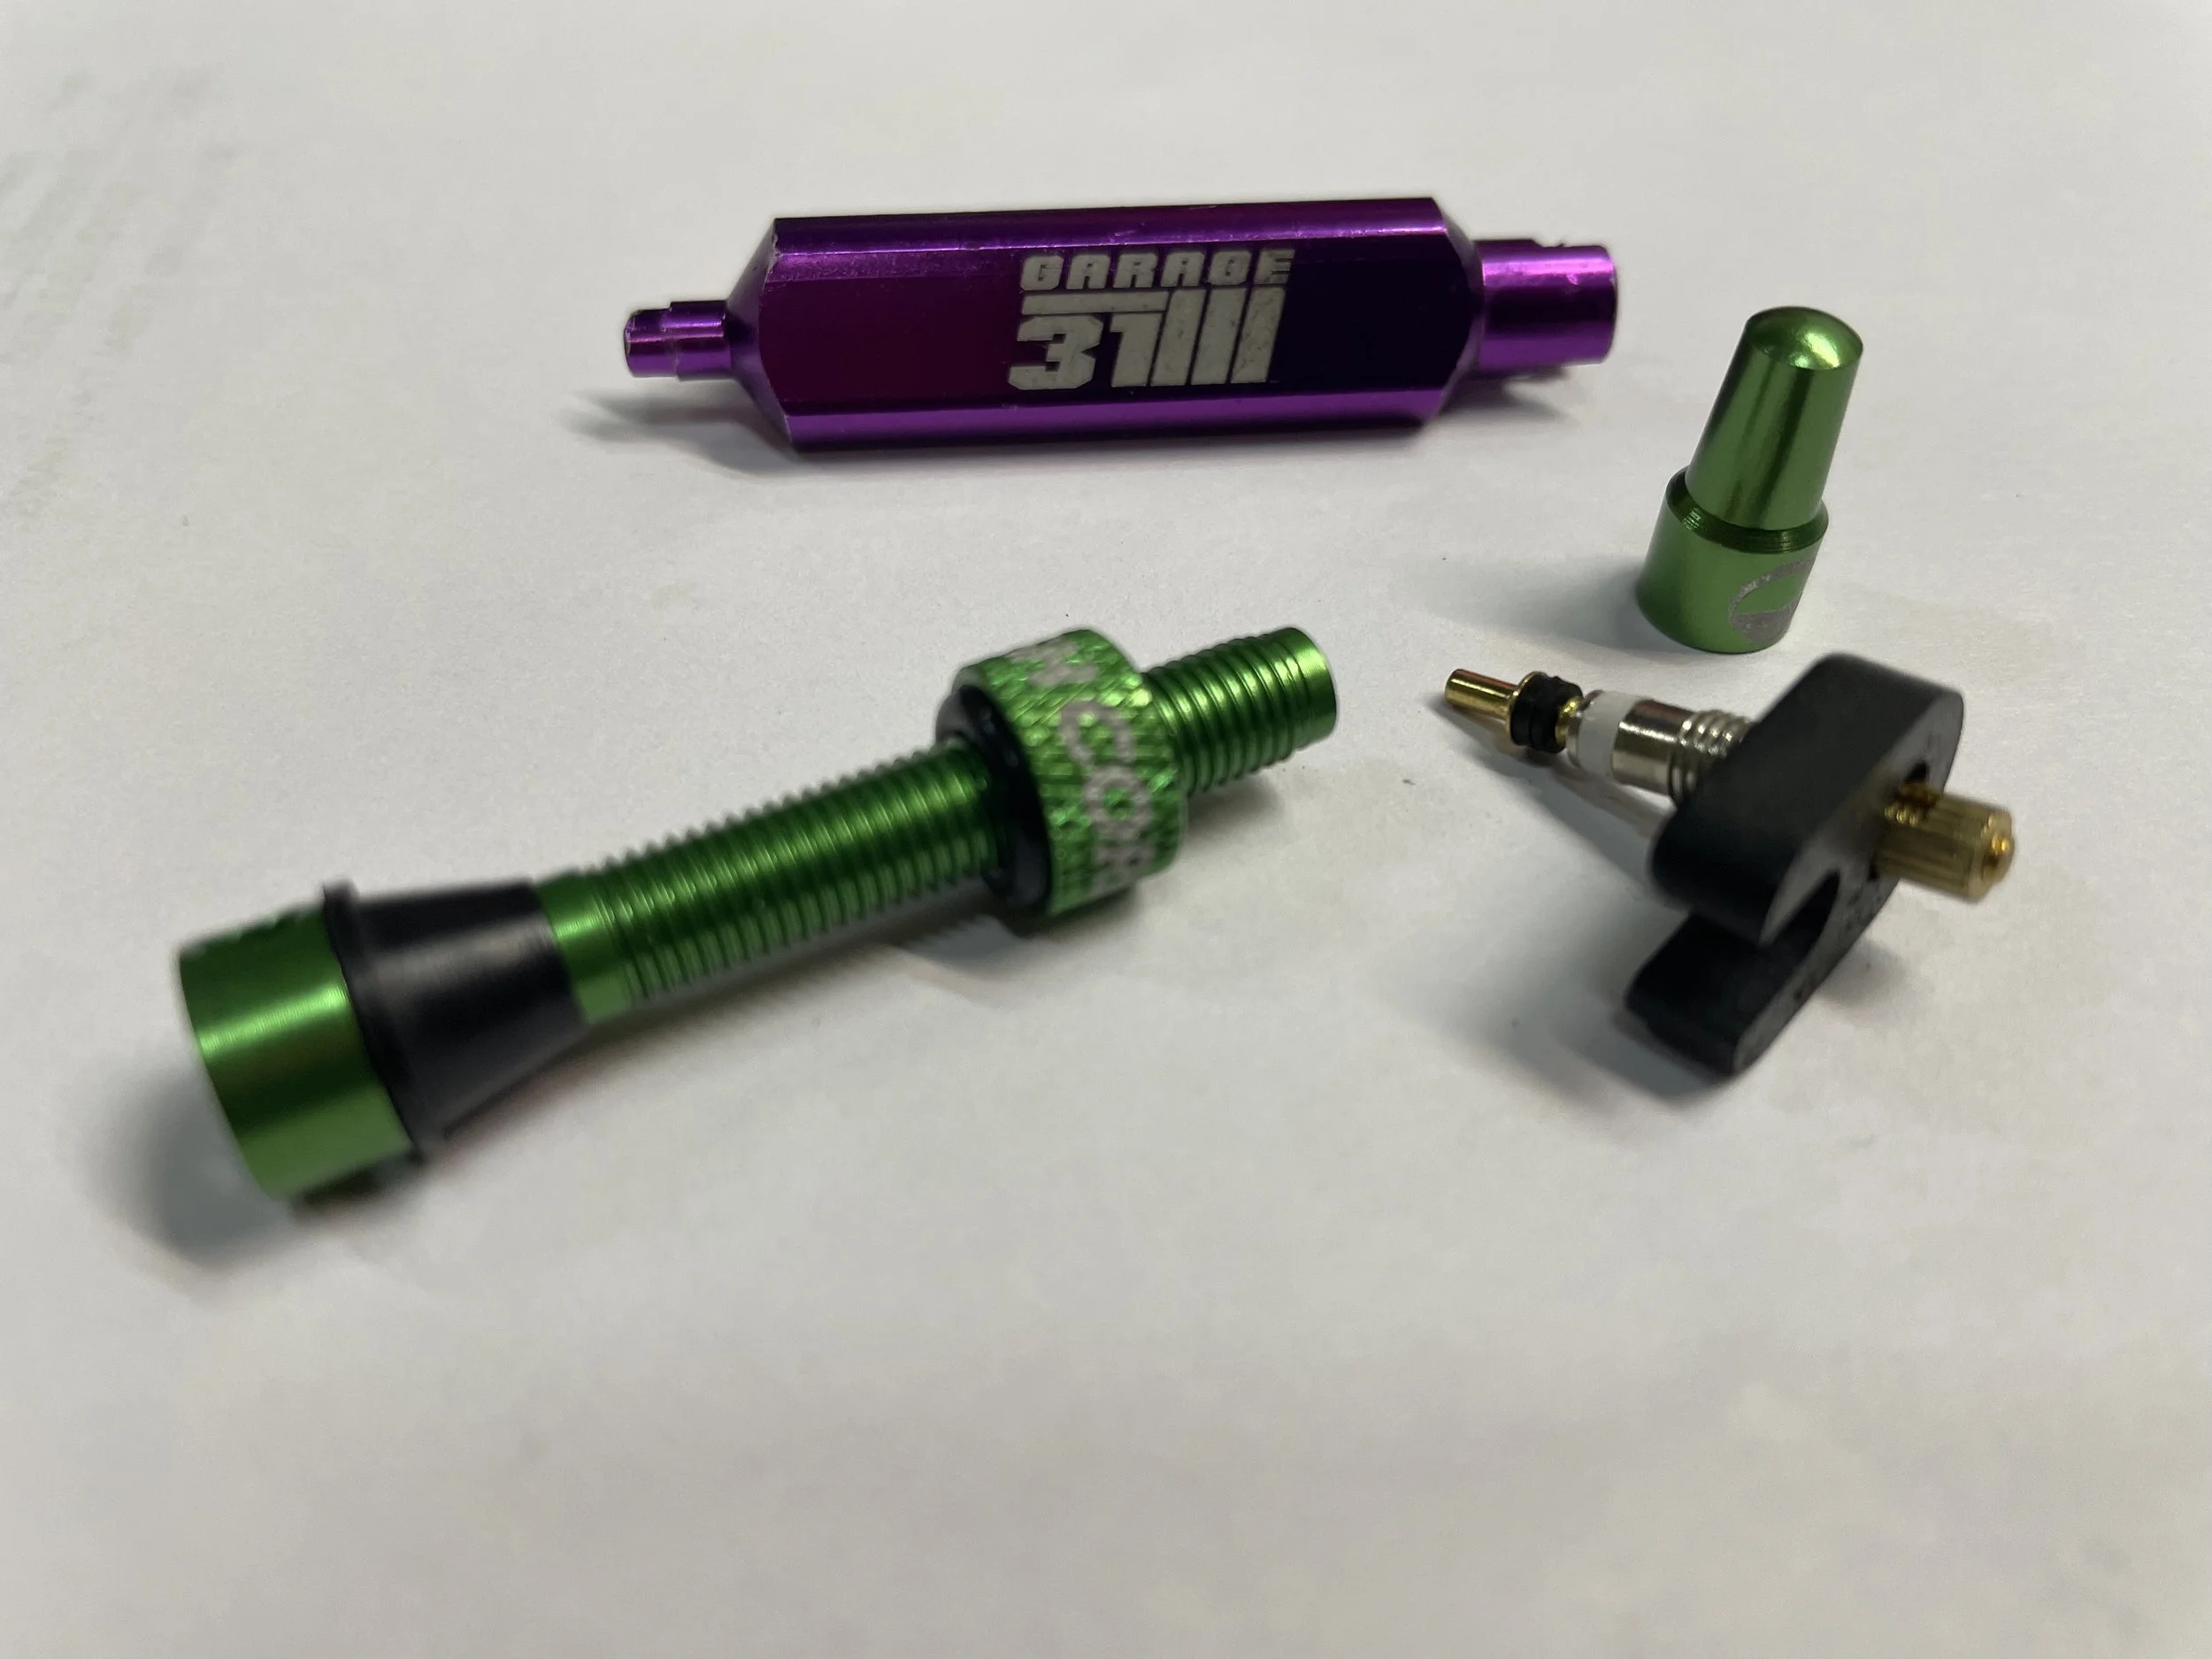
the STANDARD presta valve core remover (black tool seen here) is all you need to get that core out of the valve so sealant can flow through with ease but for fancy MECHANICS, the garage 31 toolrage31.ca is a nice upgrade.
tubeless tires are something we work with every single day in our north shore bike shop, so we take a lot of pride in our tubeless jobs. we carry a wide selection of rim tape options, and in the testing those tapes on various rims, we’ve found some tapes work better on some finishes than others. those kind of trade secrets are something we only reveal in person, when you come see us for a tape/tubeless fix.
but what’s not so secret is how to inject your sealant without an “injector” and without taking the tire off the rim, not even on one side!
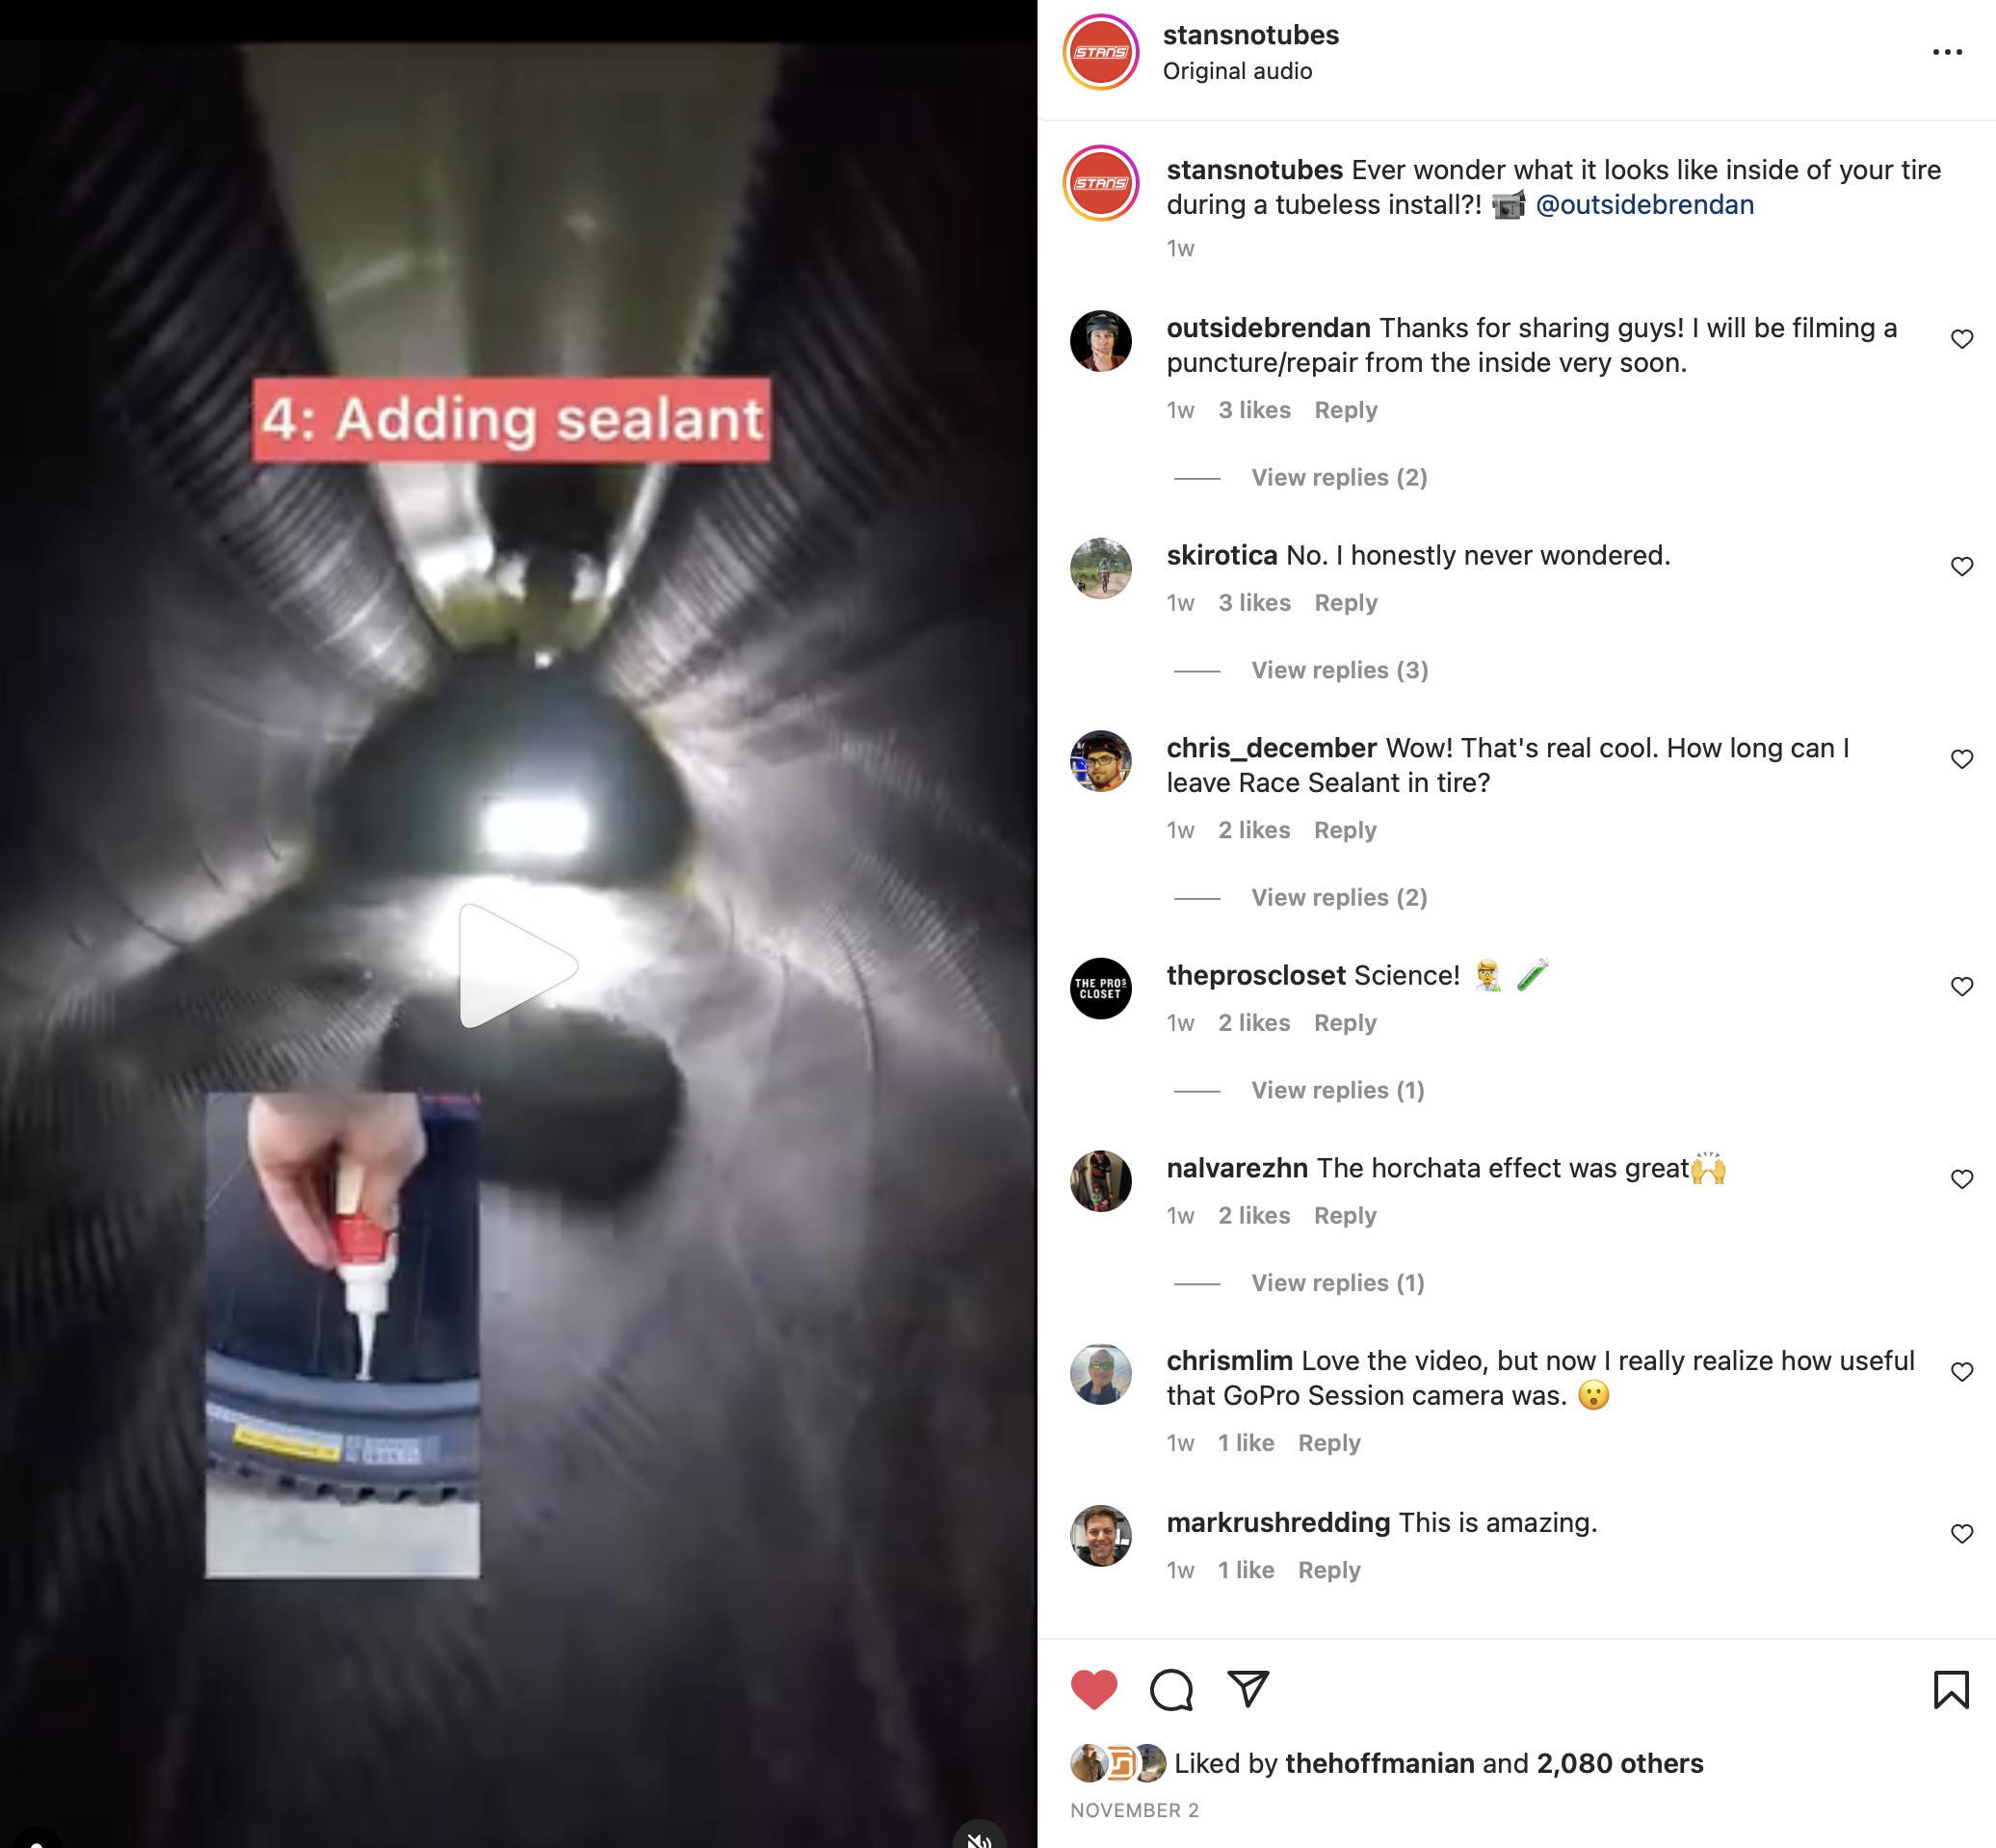
I could go on and on, but check out this recent video from stan’s no tubes where the team put a camera inside a tubeless tire during setup to get a look at what’s going on in the black hole that is the space between rim and rubber. as you can see in the screenshot below, all the team at stan’s has done to inject the tire with fresh sealant is pull out the valve core and empty a 2 ounce stan’s squeeze bottle right into the tire.
so how much sealant do you need?
we recommend 2-3 ounces for 27.5 tires, and 3-4 ounces for your 29ers. if it’s gravel tires your topping, you’ll likely never need more than a 2 ounce bottle.
a pint of sealant should last you about ten top-ups (five if we’re talking about tires/wheels as a set of two), so one bottle is more than a years’ supply.
getting the sealant inside the tire is easy, i promise, and it’s really not even that messy once you learn a few tricks. so come on down and pick up a bulk bottle of stan’s sealant, a 2 ounce squeeze bottle to manage the sticky stuff, and stay tuned to sign up for our “everything tubeless” maintenance course in just two weeks.
The course will cover everything from rims inspections to valve integrity, taping best practices and how to safety seat your beaded tires. we will look at road/gravel and mountain tires — and the lessons we have planned for this bike MAINTENANCE coourse will transcend tubeless fixes, makign you a better mechanic overall.